Adding custom Teams bots
DX allows sending MS Teams surveys through custom Teams bots. A DX workspace can have multiple Teams bots configured for different use cases (e.g., different types of surveys).
Prerequisites
- An account with access to Microsoft Entra ID to create App registrations
- Access to the Microsoft Teams Developer Portal
- Permission to upload and install apps to Teams, or an IT admin who can
- DX admin access
Setup instructions
Step 1 - Register your app in Microsoft Entra ID
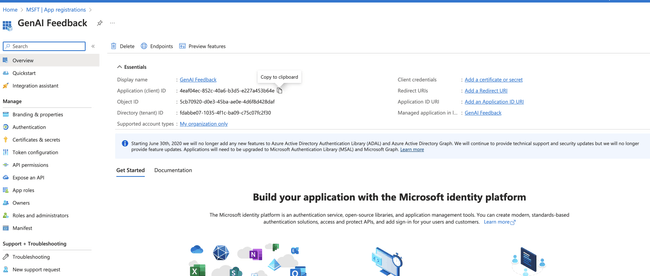
Create an app registration within Microsoft Entra ID by visiting the App registrations page in the main navigation:
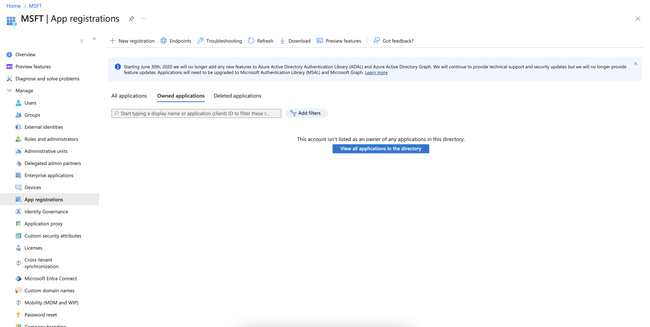
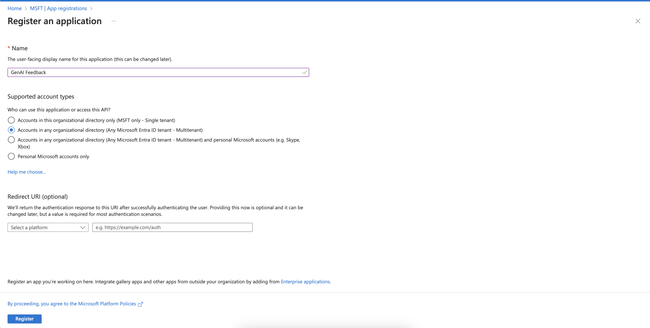
Click New registration and then type a name you’d like for your app. Then, select Multitenant and hit Register.
Step 2 - Create your Teams app
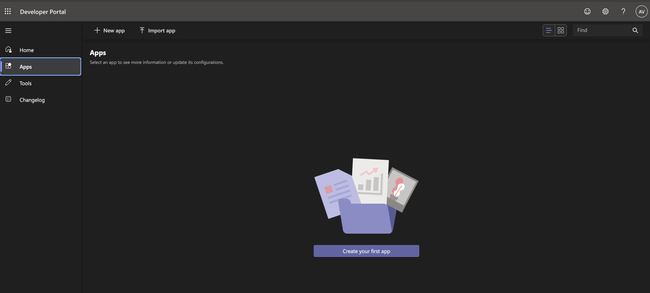
Next, open the Microsoft Teams Developer Portal and click + New app.
Fill out all required fields denoted by an asterisk:
| Field | Value |
|---|---|
| Website URL | https://app.getdx.com |
| Privacy Policy URL | https://getdx.com/privacy |
| Terms URL | https://getdx.com/terms |
When you get to the Application (Client) ID field, paste in the Application ID from the Entra app registration you created earlier:
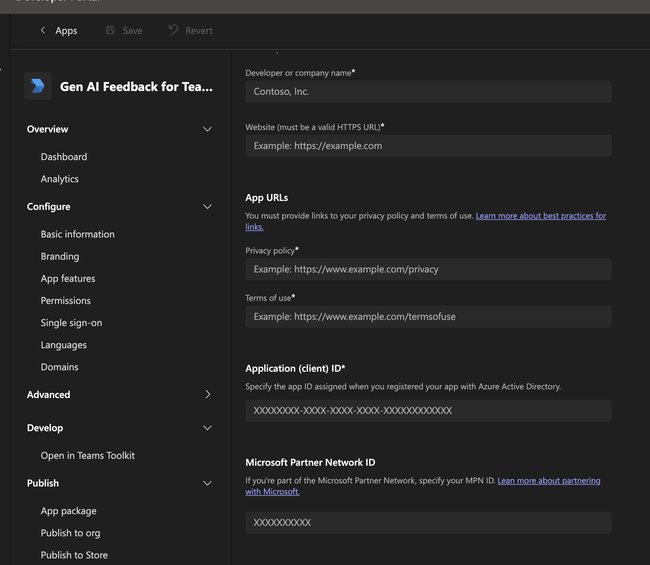
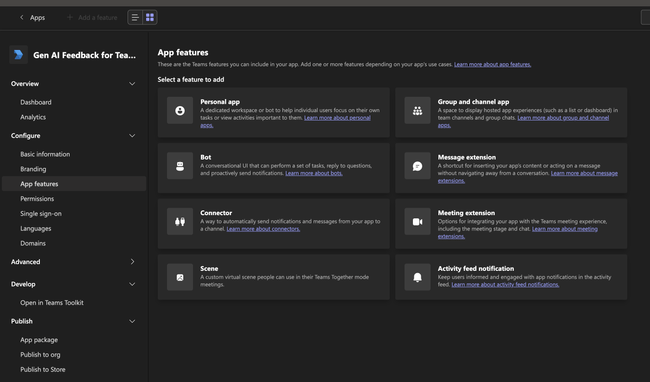
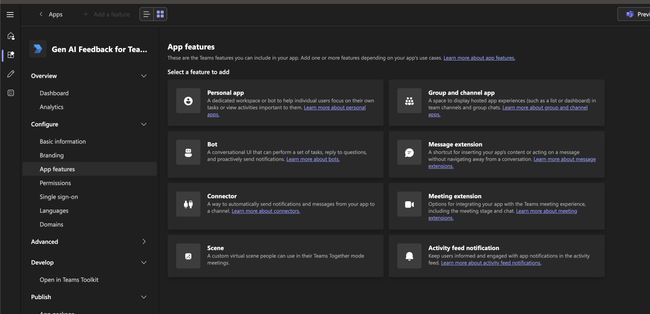
Be sure to scroll to the bottom and hit Save. Then, go to App features in the main navigation and click the Bot tile to configure a bot for your app.
Step 3 - Configure a bot and its endpoint
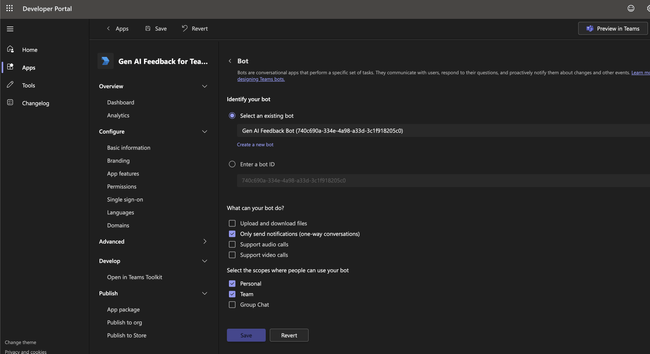
Under Identify your bot, choose Select an existing bot and then click Create a new bot.
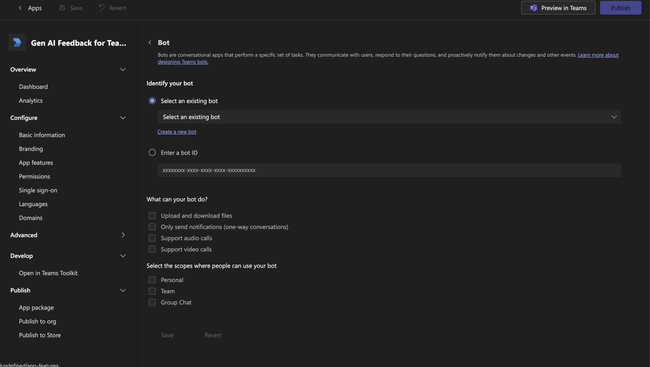
On the next screen, give your bot a name. The name you choose will be what your respondents will see in Teams.
After you’ve specified a name, configure the endpoint address with:
https://app.getdx.com/microsoft/interactionThen click Save.
Step 4 - Configure permissions and generate a client secret
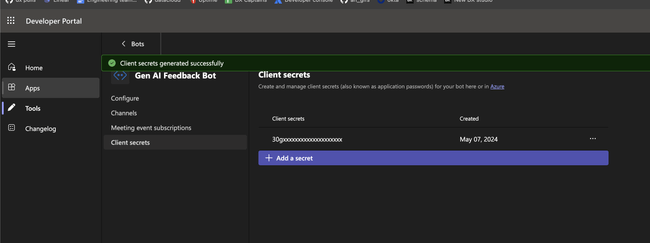
In the left navigation, open Client secrets and click Generate a new secret. Store the secret securely for later. Then, navigate back to Apps on the left and click the Teams app you started creating.
Open App features again and click Bot.
From the dropdown, select an existing bot and pick the one you just created.
In What can your bot do, select Only send notifications (one-way conversations).
In Select the scopes where people can use your bot, select Personal and Team.
Click Save.
Next, in the left navigation open Permissions and check the box for Send the user notifications.
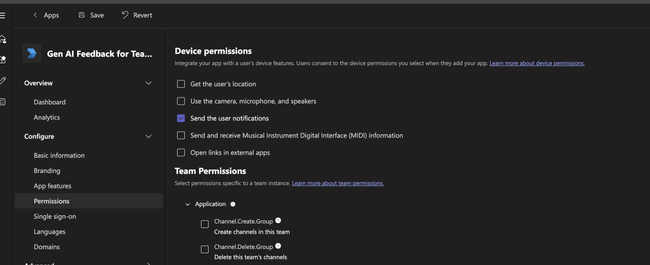
Expand Application permissions and check TeamMember.Read.Group.
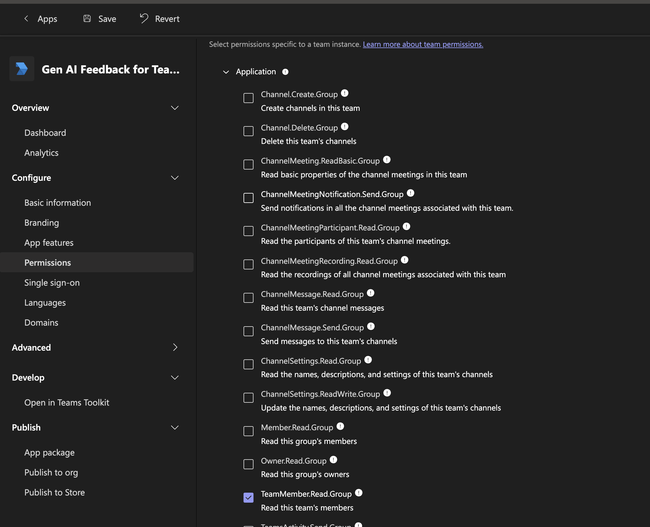
Scroll to the bottom and click Save.
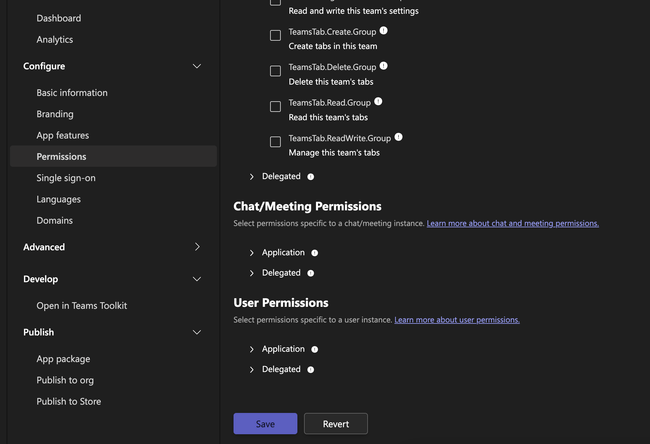
Step 5 - Export your app package
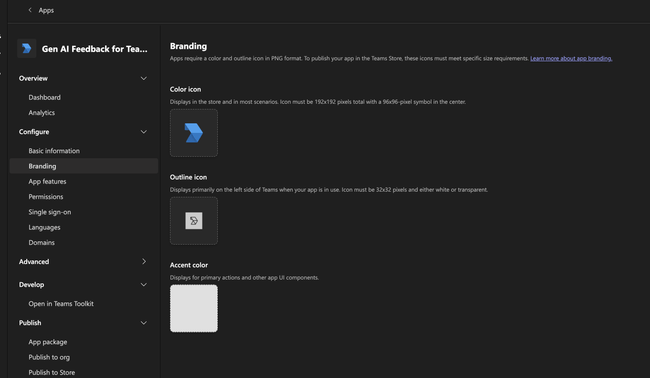
Be sure to add an icon from Branding before exporting:
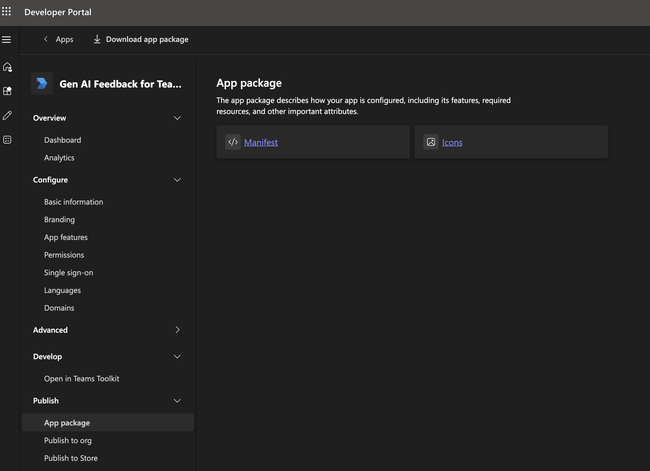
To export the app, select App package in the left-hand navigation and click Manifest.
The manifest.json file should look very similar to this, but with different IDs for id and botId:
MS Teams manifest example
{
  "$schema": "https://developer.microsoft.com/en-us/json-schemas/teams/v1.17/MicrosoftTeams.schema.json",
  "version": "1.0.0",
  "manifestVersion": "1.17",
  "id": "60711477-760f-4a73-8d23-c37d97bf8dff",
  "name": {
    "short": "Gen AI Feedback for Teams",
    "full": ""
  },
  "developer": {
    "name": "DX",
    "mpnId": "",
    "websiteUrl": "https://app.getdx.com",
    "privacyUrl": "https://getdx.com/privacy",
    "termsOfUseUrl": "https://getdx.com/terms"
  },
  "description": {
    "short": "App to gather feedback from developers",
    "full": "App using DX to gather feedback on internal tools for the platform team."
  },
  "icons": {
    "outline": "outline.png",
    "color": "color.png"
  },
  "accentColor": "#FFFFFF",
  "staticTabs": [
    {
      "entityId": "conversations",
      "scopes": ["personal"]
    },
    {
      "entityId": "about",
      "scopes": ["personal"]
    }
  ],
  "bots": [
    {
      "botId": "740c690a-334e-4a98-a33d-3c1f918205c0",
      "scopes": ["team", "personal"],
      "isNotificationOnly": true,
      "supportsCalling": false,
      "supportsVideo": false,
      "supportsFiles": false
    }
  ],
  "validDomains": [],
  "webApplicationInfo": {
    "id": "4eaf04ec-852c-40a6-b3d5-e227a453b64e",
    "resource": ""
  }
}
Click Download app package in the top navigation. You should get a ZIP file that consists of the manifest and branding assets (three files).
Step 6 - Add the bot in DX
Browse to Administration → Teams and click + Add.
- Enter the name of your Bot (not your Teams app). This must match the name you created earlier exactly.
- Paste the Bot’s application ID (this is the
botIdin the manifest). - Paste the client secret you generated earlier.
- Click Save.
Step 7 - Make your bot multi-tenant
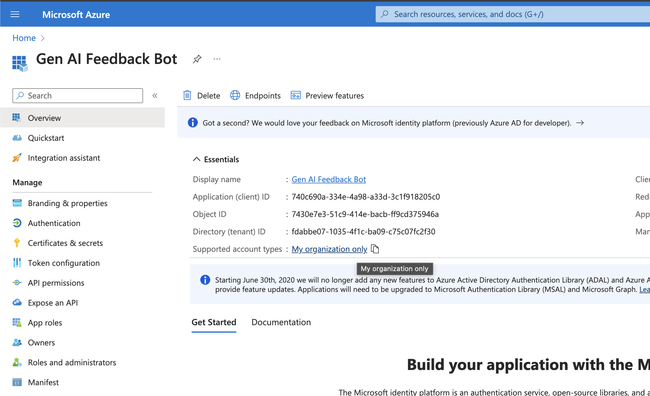
Within Microsoft Entra ID, navigate to your bot and click where it says My organization only under Supported account types.
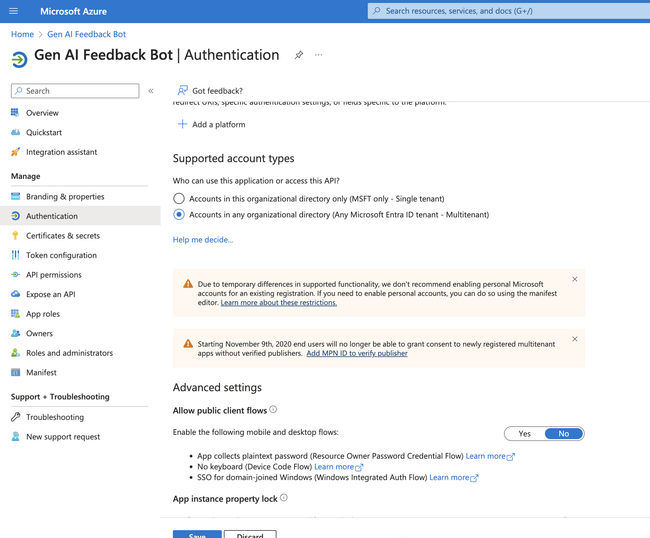
Change this to Accounts in any organizational directory and click Save.
Step 8 - Install your app to a team
In Microsoft Teams, navigate to the team(s) you’d like to install the app to. The team(s) should be the same one(s) that the main DX app is installed to and contain all potential survey subjects as members. You can only send surveys to users who are members of the teams the app is installed to.
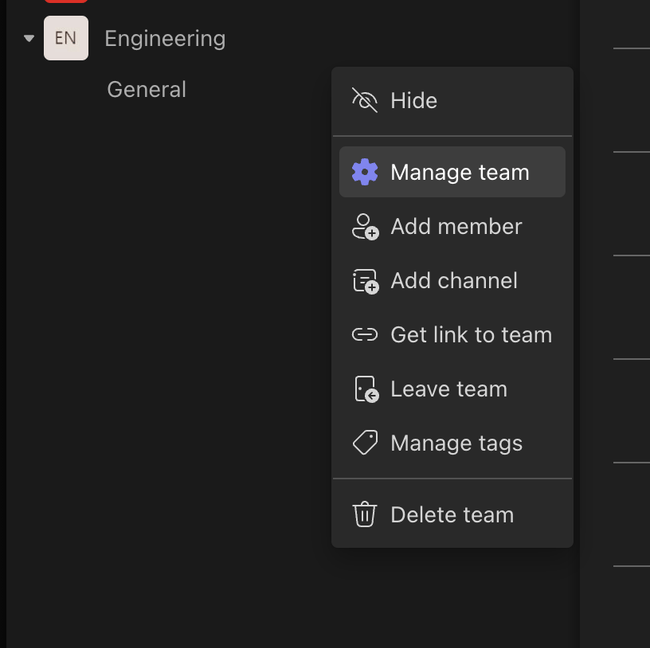
Right-click on a team and select Manage team.
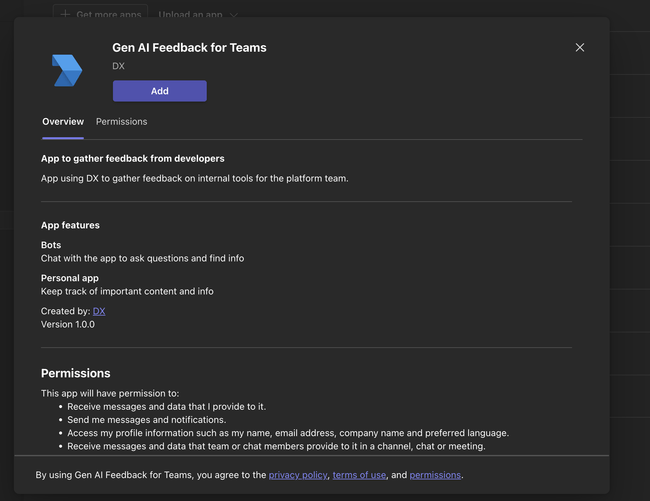
Go to Apps in the menu and click Upload an app. If this menu does not show, contact an IT admin to have them install it to the team.
Select your ZIP file, click Add, then Set up a bot.
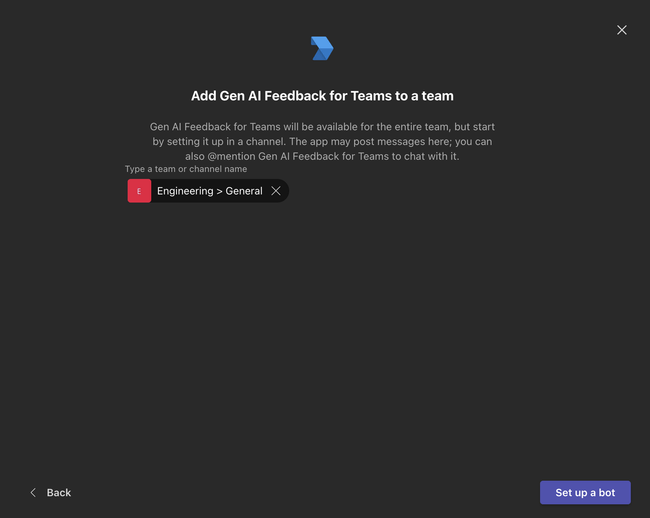
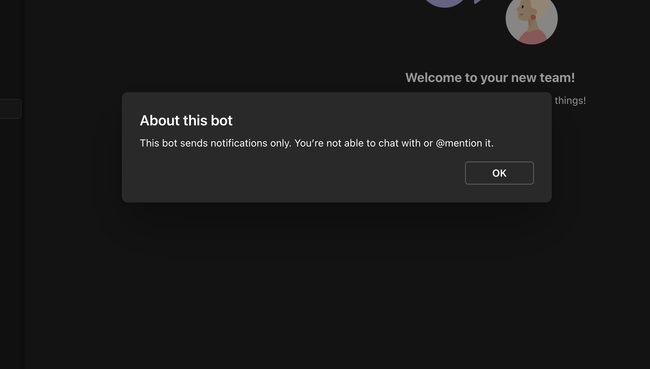
You should get a message confirming the bot was successfully installed.
